Hello Friends,
Welcome back to the final part i.e. Part 2 of the series. For those
who have missed the first part please refer to the below link
https://vikasaxaptandd365fno.blogspot.com/2022/12/create-cusotm-services-in-d365-f-and.html
So let's start with the Testing !!!
To test any Services/Data entity for D365 we are required to
generate the Access Token. An access token is used the authenticate the user from
Azure Active Directory.
To make the authentication happen(i.e. Generate Access Token), we need to create a new
App registration in the Azure portal. Follow the below steps to Create App Registration, add the same in D365 F&O and Connect using Postman.
1) Log in to Azure Portal https://portal.azure.com/#home
2) Search for App Registration
3) Create New App Registrations.
4) Provide some logical name for the App registration, Select "Supported Account Type" as required. Enter the URI and Click on the Register button.
5) New app will be registered as you can see below. Click on "Add a certificate or secret" to create a new client secret.
6) Click on "New Client Secret" and Enter the Description and Expire period of this key. New Client Key needs to be generated again after expiration.
7) Make the note of the value as it will not be visible later. If you have lost the value, then you have to generate the client secrete again.
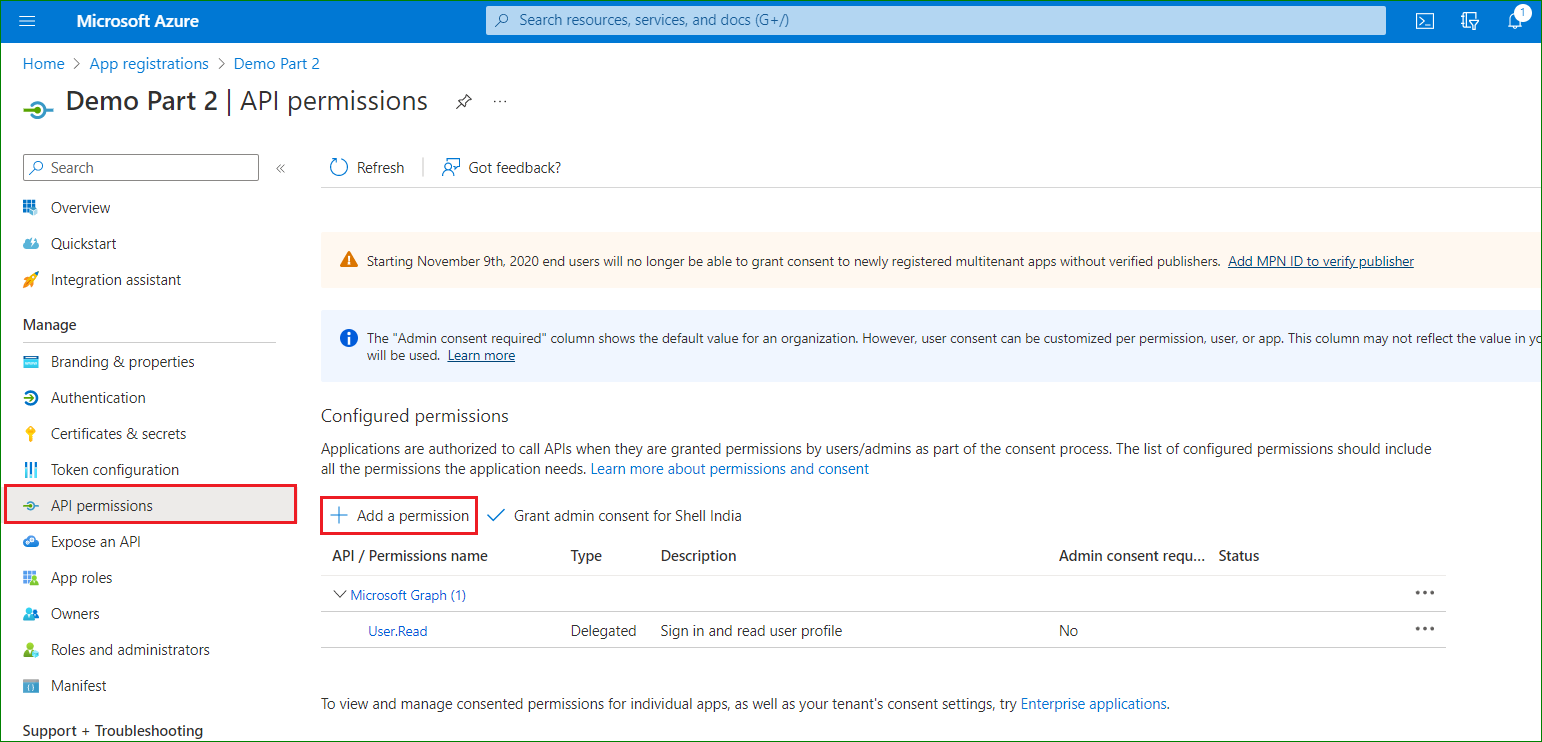
8) After the Secret value is generated, you need to give the permissions. Click on "API Permission" and then click on Add Permission.
9. Select "Dynamic ERP" for the Microsoft D365 F&O.
10. Now grant the permission as per your business requirement. Here in this demo, I am providing full access.
And you are ready with your app registration.
Kindly Make note of 3 things
1) Application (Client) Id
2) Directory (Tenant) Id
3) Secrete Value. (Created in step 7)
11) Add the Application (Client) ID to D365 F&O
Login to your D365 Application(the link that you mentioned in step 4) and Navigate to System Administration --> Setup --> Azure Active Directory applications and add the Application (client) Id in the Client id along with the User.
12 Now let's configure Postman to connect with D365 Service. Keep the below items handy before you start with the configuration.
a) Application (Client) Id: Available with app registration
b) Directory (Tenant) Id: Available with app registration
c) Secrete Value. (Created in step 7): Available with app registration
d) Microsft AD URL: This is the general URL kindly put your tenant Id as mentioned in point b.
like "https://login.microsoftonline.com/{Tenant-ID}/oauth2/token" example "https://login.microsoftonline.com/de85726a-xxxx-xxxx-xxxx-xxxxxxxx/oauth2/token"
You can either install Postman on your local machine or use the web version "https://www.postman.com/"
13) Create a new Request as type Post, Enter the Service URL, and enter the details as shown in the figure below under the "Authorization" tab --> Configuration options
14) Go to Authorization --> Advance option and enter D365 F&O URL as mentioned below.
15) Click on the "Get New Access Token" button and click on proceed button on the popup.
16) Click on the Use button to use the access token in the Request.
17) Go to the Body section and select "Raw". Enter the parameters required to pass. In our case, it will be as below.
{
"_keys": [
{
"vendorId": "V0000025",
"legalEntity": "L473"
}
]
}
18) Finally We are ready to test our service. Click on Send Button to test the service. You can see the result in the Body section.
Below is the screenshot from D365 for the same vendor.
That's all for now. See you soon with the next blog.


Comments
Post a Comment